Scheduling Notebooks with SingleStore Job Service
On this page
A scheduled execution of a notebook is referred to as a Job.
After scheduling, the job service creates a snapshot.
You can create and manage scheduled jobs using the Cloud Portal or via the Management API.
Schedule Jobs using the Cloud Portal
Create a Scheduled Job
Jobs can be scheduled for shared notebooks only.
-
Using Jobs in the left navigation
Click Schedule (on the top right).

-
Using Shared Notebooks
-
Navigate to Data Studio > Shared .
-
Select a shared notebook.
-
Select Schedule (on the top right).

-
New Scheduled Job
After selecting Schedule, a dialog box will appear.
Enter the Job Settings.
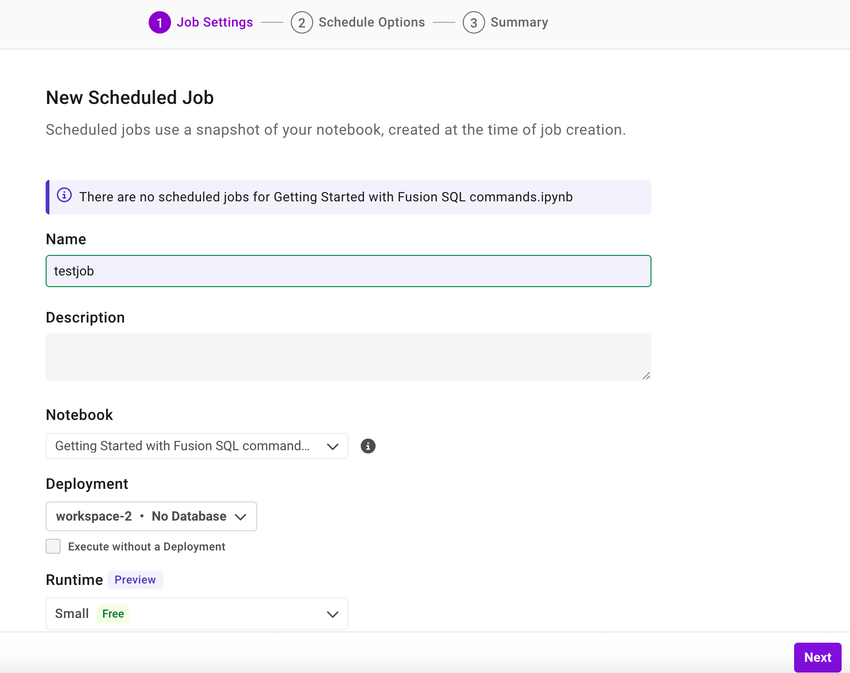
|
Job Settings |
|
|---|---|
|
Name |
Enter a name for the job. |
|
Description |
Enter the job description. |
|
Notebook |
Select a shared notebook to run the job. |
|
Deployment |
Select the SingleStore deployment (workspace) your notebook will connect to. Selecting a workspace allows you to connect to your SingleStore databases referenced in the Notebook natively. |
|
Runtime |
Select a runtime - Small, Medium, or GPU-T4, based on your use case. Note This field is in preview. |
Click Next.
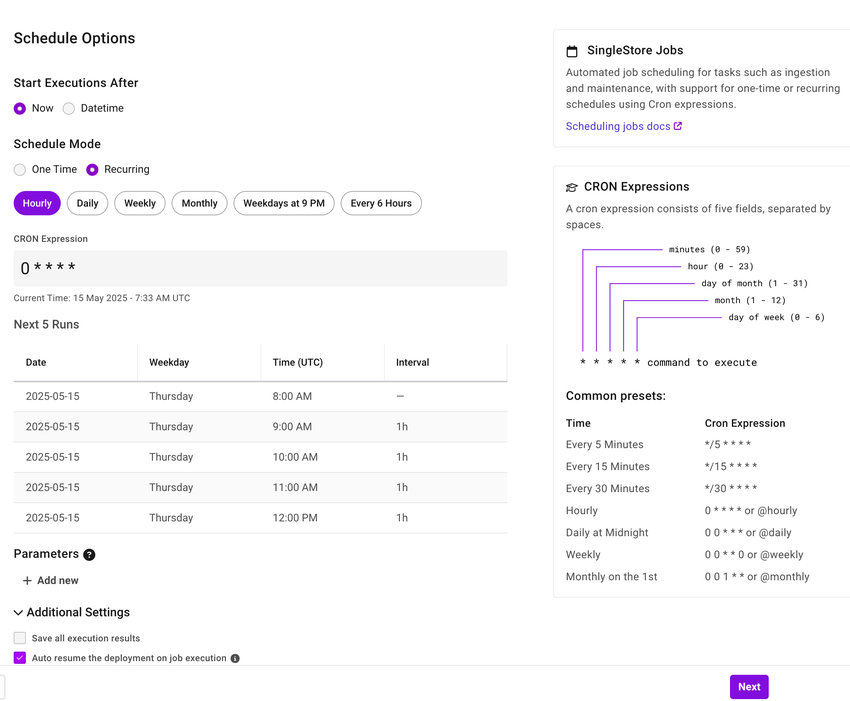
|
Scheduled Options |
|
|---|---|
|
Start Executions After |
Specify the date and time for the first run of the scheduled job.
|
|
Schedule Mode |
Specify the frequency to run a scheduled job.
|
|
Parameters |
Specify your job parameters for the scheduled job.
Note The system injects parameters as Python variables into the notebook while the scheduled job runs, and you can access them using the variables where required. |
|
Additional Settings |
|
Click Next.
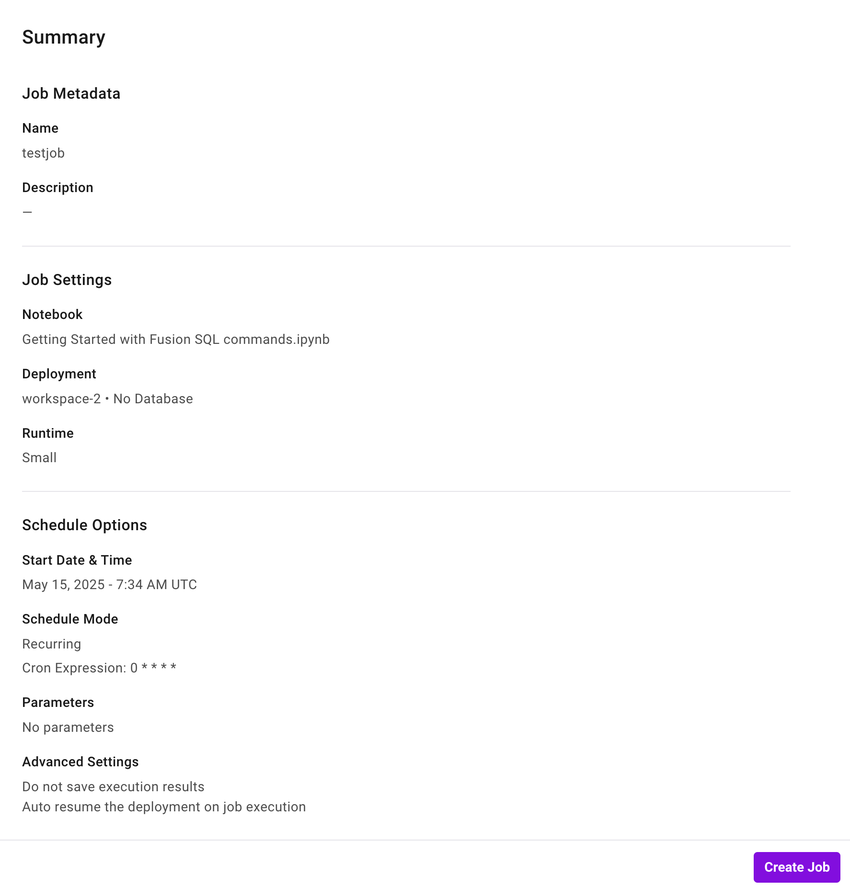
Click Create Job to schedule your job.
Manage an Existing Job
To view existing scheduled jobs and job runs, select Jobs in the left navigation pane.
View a Job
To view a job, select the job name under the Name column.
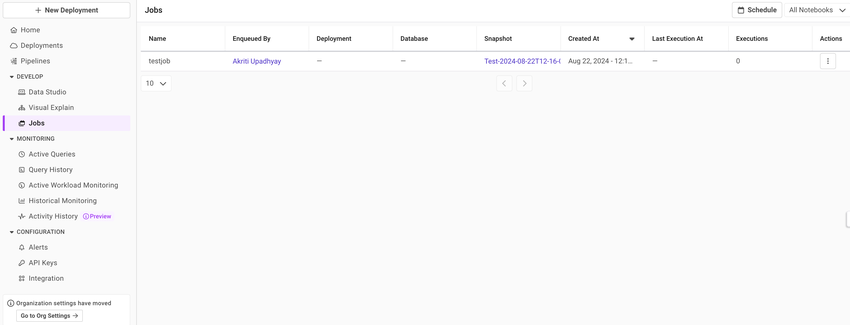
You can view the following job execution details for each job:
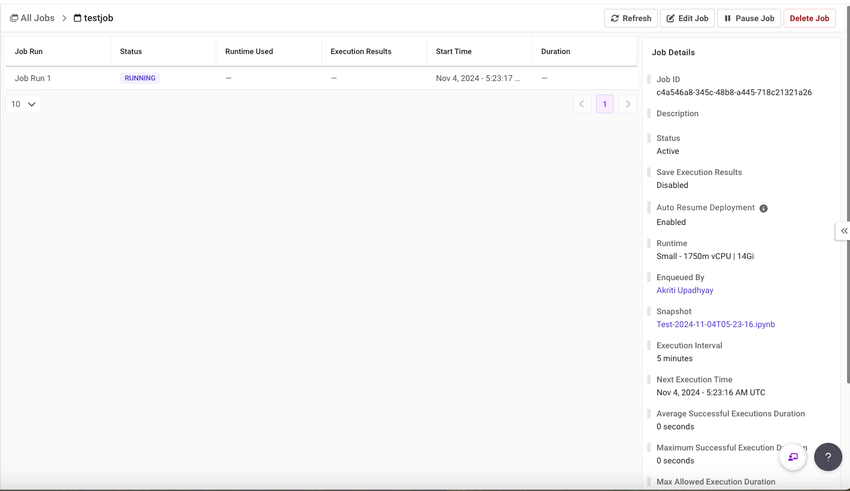
You can view the details of a job on the Job Details pane in the right navigation.
Edit a Job
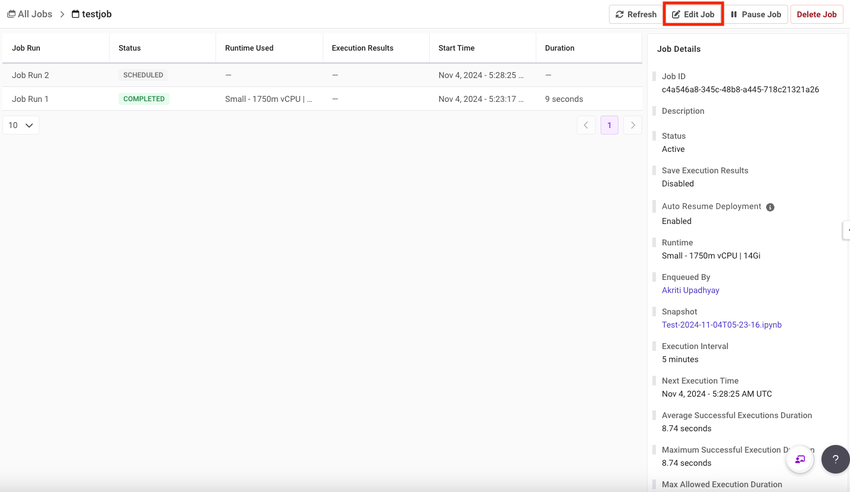
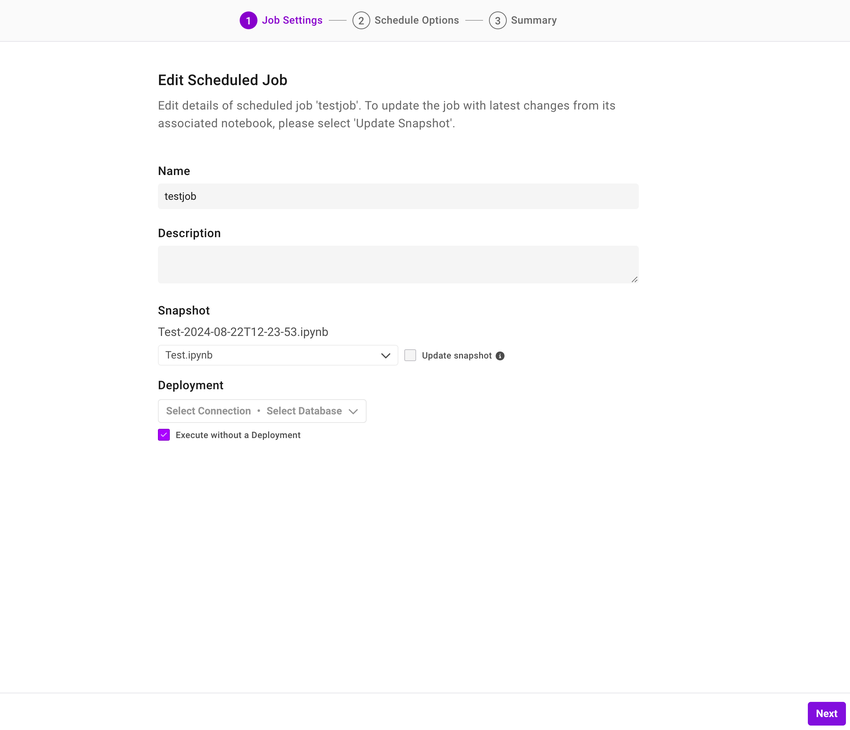
To edit an existing job, select Edit Job.
Pause a Job
To pause an existing job, select the ellipses in the Actions column of the job, and select Pause.
Resume a Job
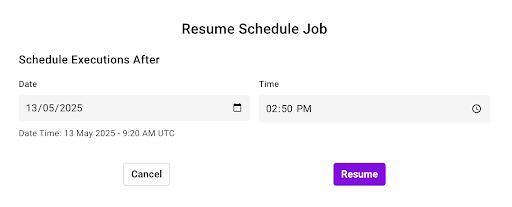
To resume an existing job, select the ellipses in the Actions column of the job, and select Resume.
Delete a Job
To delete an existing job, select the ellipses in the Actions column of the job, and select Delete.
Warning
Deleting a job removes all associated job runs, including snapshots.
Schedule Jobs using the Management API
Use the Jobs path (/v1/jobs endpoint) to create and manage jobs using the Management API.
For example, the following API call returns information about the job with the specified jobID:
curl -X 'GET' \ 'https://api.singlestore.com/v1/jobs/7b68b78d-0000-1000-9000-0864fd331524' \ -H 'accept: application/json'Status of Job Executions
|
Status |
Description |
|---|---|
|
Scheduled |
The next scheduled run for the job. |
|
Completed |
The notebook in this job run ran to completion. |
|
Failed |
The execution failed due to user error. |
|
Error |
An error unrelated to the notebook code prevented this job from completing. |
Troubleshoot Job Runs
SingleStore automatically saves an execution result notebook of an execution that fails.
|
Error |
Solution |
|---|---|
|
Workspace Deleted |
Edit the Job and select a deployment. |
|
Workspace Suspended |
Resume the workspace, or create a new job schedule with a different deployment. |
|
Database Detached |
Reattach the database with the right permissions or create a new schedule job with a different database. |
|
Internal Errors / Misc |
Reach out to SingleStore Support or use the chat feature in the Cloud Portal. |
|
Notebook Timed Out |
View the snapshot to identify the cells where the notebook is timed out. Refer to Configurability and Key Considerations for the Execution Time limits set on a job run. |
|
Notebook Deleted/Not present |
Create a new scheduled job with a different notebook. |
Configurability and Key Considerations
The snapshot version of a notebook runs at the scheduled start time.
An execution time limit is set for each job run which is determined by the organization:
|
No Active Deployment |
Active Starter Workspace in Free Shared Tier |
Active Standard Workspace |
Active Workspace in Enterprise Edition |
|
|---|---|---|---|---|
|
Maximum allowed execution duration |
5 minutes |
15 minutes |
15 minutes |
30 minutes < x < 120 minutes. Where x = Execution interval/5 |
|
Minimum execution interval |
60 minutes |
60 minutes |
60 minutes |
60 minutes |
|
Maximum execution interval |
30 days |
30 days |
30 days |
30 days |
|
Total active recurring jobs |
1 |
5 |
5 |
30 |
Last modified: May 15, 2025

